Turning raspberry PI into WIFI AP: SSG5 to SRX migration (part 2)
Due to the insecure of internet platform, I have decided to run a security appliance at home to replace my SSG firewall. My newest design is to have SRX as the SSG replacment. Since SRX lacks of the feature of build-in WIFI, I have decided to use RASPBERRY PI as the WIFI AP bridge to cover the wireless access feature. In part 2 of this migration, it mainly focus on turning the RASPBERRY PI as the WIFI AP and bridge it to its ETH0 interface.
The WIFI AP elements:
– Raspberry PI model B
– 0ace:1215 ZyDAS ZD1211B 802.11g
Design for PI:
– Since the ESXi host is using trunk, the PI needs to have its NIC ready to take tagged and untag packets.
– PI turns the WIFI NIC into WIFI access point
– PI needs to bridge the ETH NIC and WIFI NIC to extend the SRX LAN boardcast domain with wireless capability.
Continue reading
Traffic Engineering – MPLS
This time we will handle the basic traffic engineering within a MPLS network. This technique allows network admin to manipulate the traffic and fully utilize the subscribed bandwidth or circuits.
Traffic engineering within a MPLS network can be more accurate and convenience than in a typical TCP/IP network, because TE are happened at the MPLS level only, which would not affect the base of the whole network topology. If manipulate traffic at the IP level, everything running on top of IP level will be affected.
The network topology for this testing is listed below.

Continue reading

Playing with Multicast – Part 4 – NV-MVPN on Junos
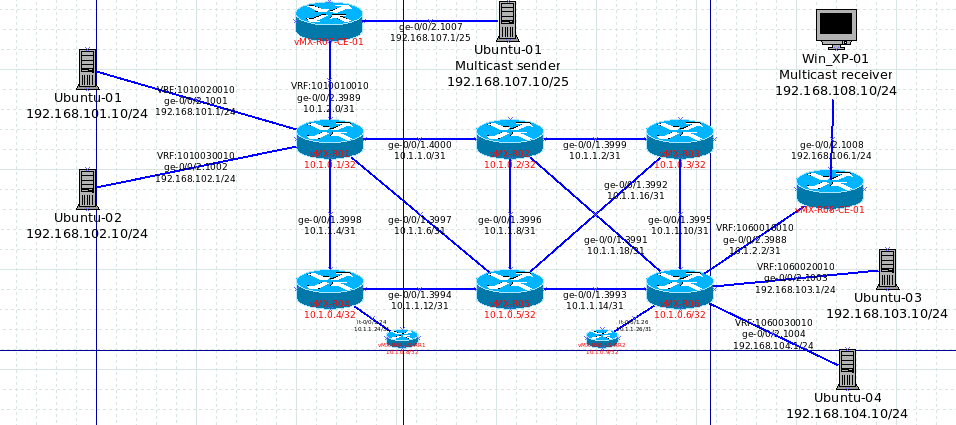
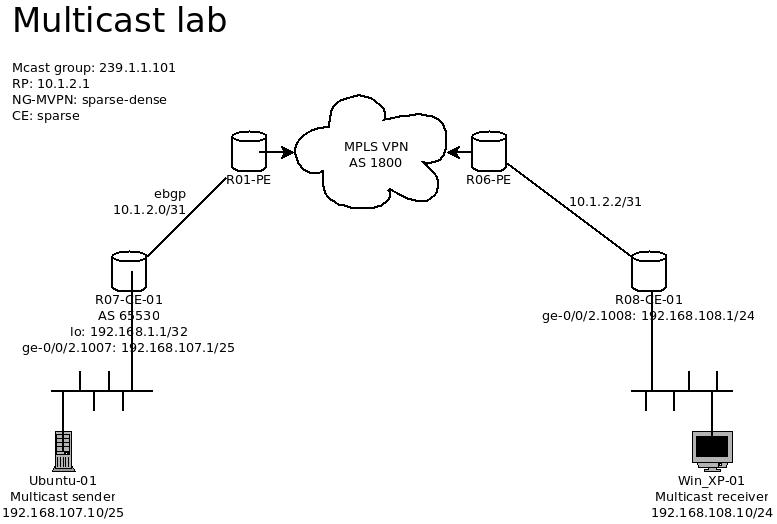
It sure has been some times since the last multicast post. This time, we will put the lab into a higher level, and will be running the multicast on the MPLS VPN platform. Since this post is focusing on MCast only, the configuration for MPLS network will not be described with my detail. So let s dig in.

Continue reading

Playing with Multicast – Part 2.
The part 1 of multicast was simply doing the streaming within a local area network. This time, I will put my multicast lab to a level higher and put a router between the sender and receiver.
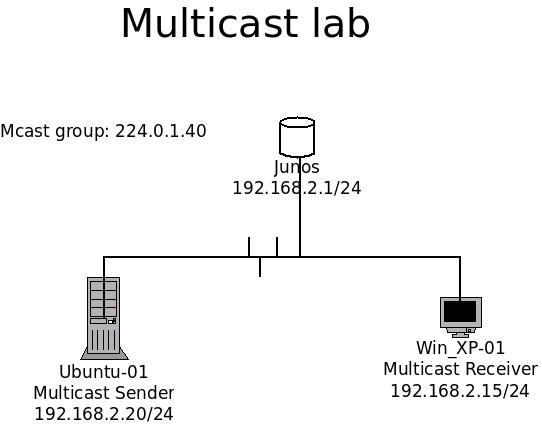
The test bed for this time will involve a simple routings. Please refer to the topology below.
To keep the multicast lab simple, it will be running on Sparse mode and using static RP instead of dynamic.
TOPOLOGY:

Components:
1x Ubuntus as sender
1x Windows XP as receiver.
1x Junos router Continue reading

Playing with Multicast – Part 1.
It really has been a long time since my previous post. I have recently received a project that deal with multicast, a old technology that is really new to me.
I have been googling around for resources and references, and there are indeed a lot of results that mostly focus on theory. Therefore, I decided to contribute some of my hands on experiences for anyone who is building a similar lab as I do.
My lab builds from simple to complex (the difficulty is really based on my own experience only.) It starts from a playing multicast at a local area network and up to a MPLS VPN network.
Part 1 of the multicast post starts with 1x receiver and 1x sender in a local area network.
Part 2 of the multicast post is describes the lab with a router and one for each sender and receiver.
Part 3 of the multicast post is describes the lab with 3 routers and one for each sender and receiver.
(still organizing the information)
Part 4 of the multicast post is putting the lab from part 2 onto a MPLS VPN platform.
(still organizing the information)
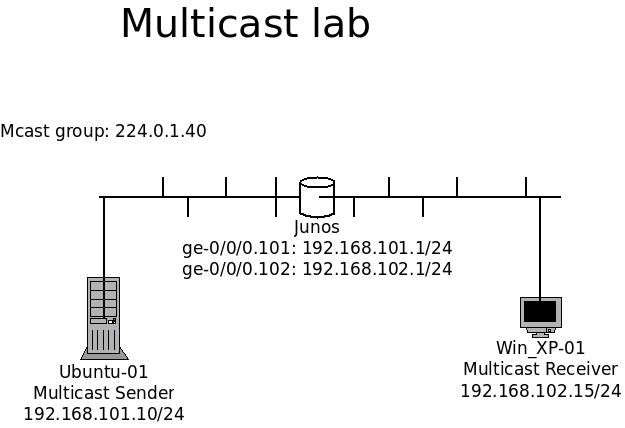
Long story short, I will go straight to the part one deployment. The lab is simple; There is only 1 sender and 1 receiver within the same broadcast domain.
TOPOLOGY:

The Sender is an Ubuntu 14.04 32bit with updated components as of 2015 Dec,02. The receiver is a Win XP 32bit machine. Both of them are equipped with 512Mb of ram and 20G of hdd. Both machines are installed with VLC as for sending and receiving. There is a Junos device as their gateway, but it can be ignored for this lab since it does not have any PIM nor IGMP configured. Continue reading
Using Dynamic DNS server with HE.net
For those who have a second level domain and are using or would like to use the Dynamic DNS (refer to DDNS below) service, they should often find that the free DDNS service does not cover enough number of hostnames (A records). The only way out was to pay extra for additional hostnames or to build their own DNS servers to support DDNS services.
I am having the same problem today as well. I have more than 5 devices that needs to be able to remote access to when I m on the road, and the DDNS providers requires me to pay extra for additional supporting devices. In my low budget case, I have found an alternative way to solve this problem, which is to go for the free DNS service from Hurricane Electronic. Continue reading
Learning OSPF with one Juniper SRX100 (basic)
One of the beauties of Jumiper SRX is it has a heritage function from ScreenOS called “virtual router”. Unlike ScreenOS, Junos has the ability link virtual routers up with logical interfaces (lt-0/0/0). With these 2 features, Virtual routers could have their own route tables, could simulate several routers within a single box of SRX, and could run routing protocols between them. (I have tried with Cisco VRF, but it doesn’t work as expected.)
Continue reading
What is DDNS?
Dynamic Domain Name Service (DDNS) is a service to associates a domain name to a dynamic IP address assigned by ISP that changes over time.
Users who subscribed internet services with dynamic IP addresses could use DDNS to provide a path to their resources, such as web services, Emil services, or file sharing services with a easily memorize domain name to access with.
Continue reading
DDNS at ScreenOS
Dynamic Domain Name Service (DDNS) is not anything new from the last decade. It associates a domain name to an IP address that changes over time. Users could access to the resources behind a dynamic IP address assigned CPE with an easily memorized domain name instead.
In this post, I ll post the procedure of setting up DDNS at ScreenOS using NO-IP DDNS service with SSL enabled in GUI. One of ScreenOS’ beauties is the GUI management.
Continue reading
Brain storming stage.
20150910, signed up a blog account and brain storming the material i ll put in here as my technical notebook in the weekend and coming future.